Vividly colored woven polypropylene feed sacks featuring horses, poultry, ranch animals, and wildlife can be upcycled into lovely and practical wine tote bags. Wine tote bags made from woven polypropylene feed sacks are extremely strong, durable, lightweight, waterproof, and easily wipe clean with a damp cloth. The straps are exceptionally strong for safely carrying a bottle of wine. Each wine tote is as beautiful as it is practical and durable.
These instructions make a wine tote bag using woven polypropylene feed sacks. This is a flat bag that is easy to store for reuse. The finished wine tote bag dimensions are 9 inches wide and 12 inches high with a handle that is 1 inch wide and 12 inches long. This wine tote bag is generously sized to hold a bottle of wine or champagne. Selection of different feed sack patterns creates a custom handmade bag that can be reused and enjoyed for many years.
Instructions
Step 1. Clean and flatten the woven polypropylene feed sack.
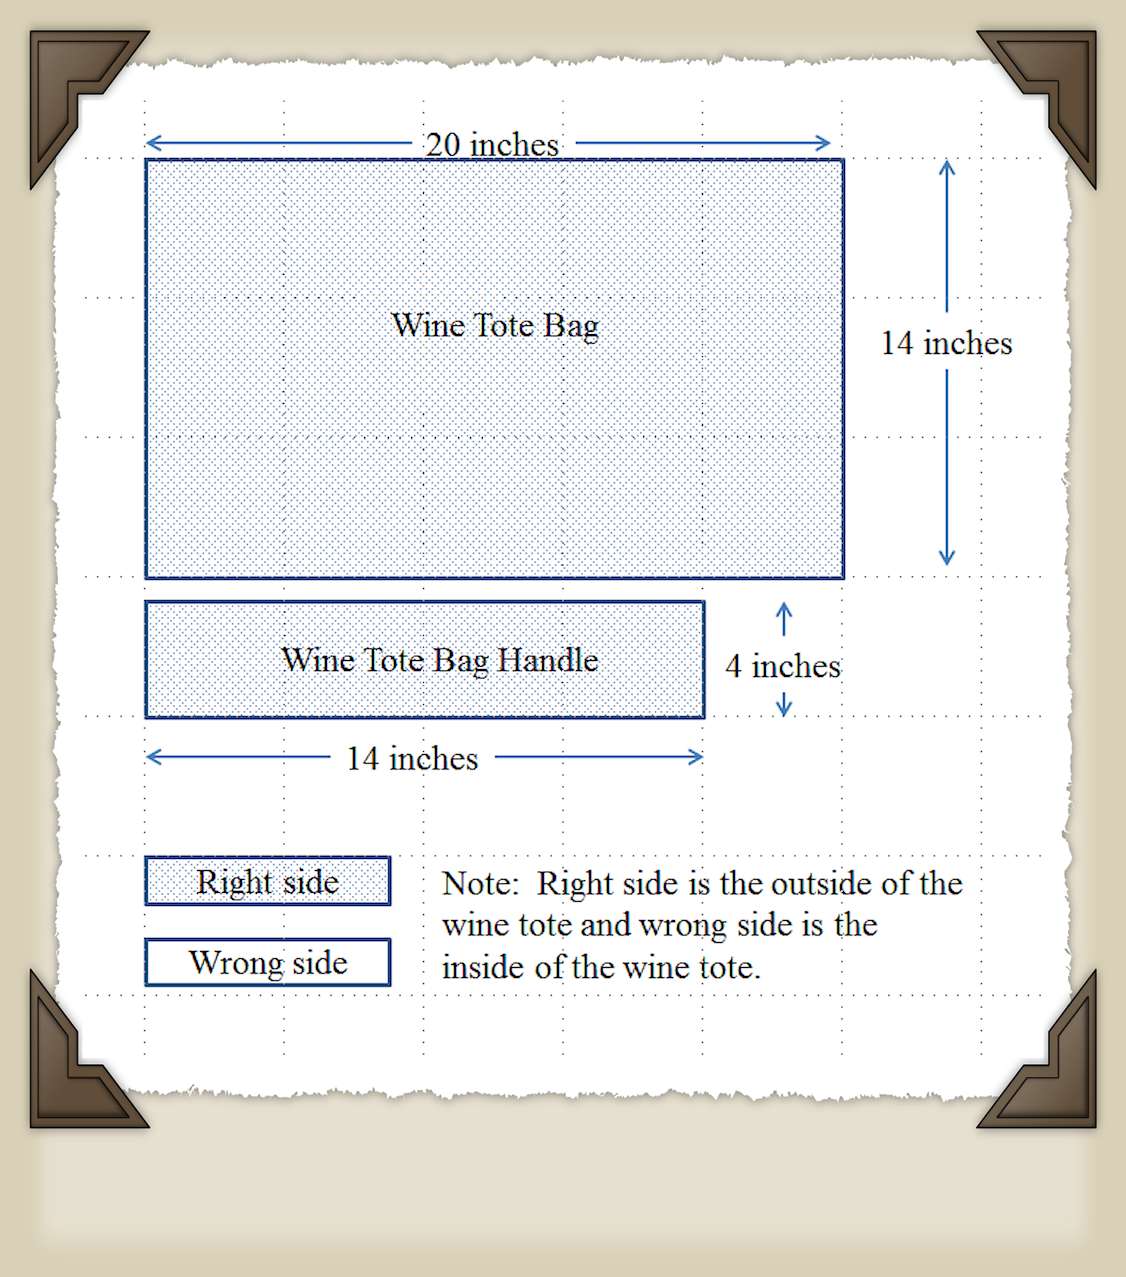
Step 2. Cut out the wine tote bag and handle using the following dimensions.

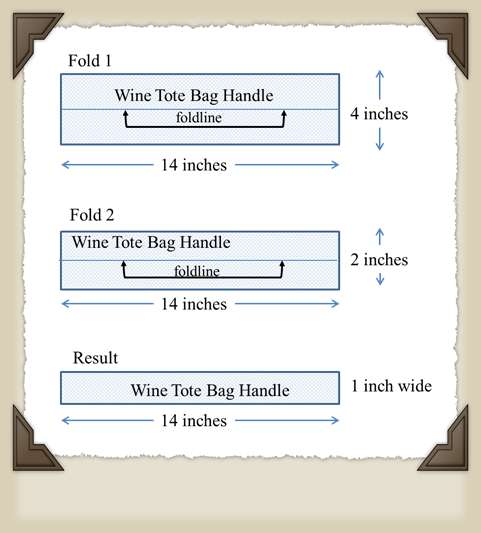
Step 3. Make the wine tote bag handle using the following steps.

A. Fold 1: Fold the handle in half lengthwise with the wrong sides together. The handle will now be 14 inches long and 2 inches wide.
B. Use your hands to press the fold flat.
C. Fold 2: Fold each unfinished edge of the handle in half with wrong sides together to produce a handle that is 14 inches long and 1 inch wide.
D. Use your hands to press the folds flat.
E. Top stitch the length of the handle. The top stitching can be whatever pattern is desired. At the minimum, a straight stitch should be used in the middle of the handle to secure the folded sides of the handle.
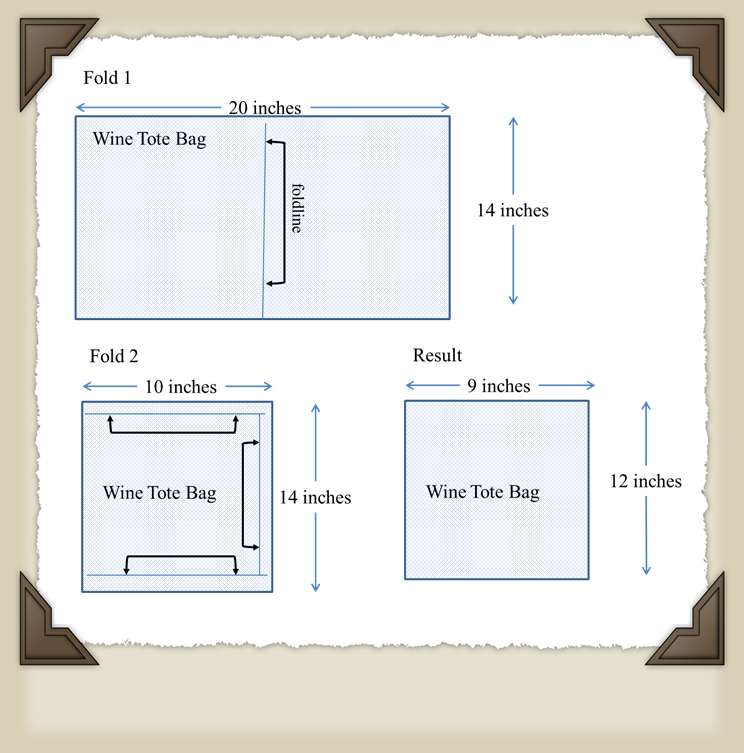
Step 4. Make the wine tote bag body using the following steps.

A. Fold 1: Fold the bag in half with the wrong sides together. The bag will now be 14 inches long and 10 inches wide.
B. Use your hands to press the fold flat.
C. Measure 1 inch from each unfinished edge of the bag for fold lines.
D. Fold 2: Fold 1 inch of each unfinished edge of the bag with wrong sides together to produce a bag that is 12 inches long and 9 inch wide.
E. Use your hands to press the folds flat.
F. Lay the bag flat and top stitch a seam ½ inch from the top of the bag.
G. If desired, add fringe or other trim to the wine bag.
H. Pin the side and bottom of the bag with wrong sides together and top stitch a seam ½ inch from the side and bottom of the bag.
Step 5. Attach the handle to the wine tote bag.
A. Measure and mark 1 inch from each end of the tote bag handle.
B. Measure and mark the center of the top of the front and back of the tote bag. The handle will be attached at the center of the front and back of the bag.
C. Place 1 inch of the handle inside of the front of the bag and pin it in place at the center mark.
D. Use at least two rows of top stitching to secure the handle to the front of the bag.
E. Place 1 inch of the handle inside of the back of the bag and pin it in place at the center mark.
F. Use at least two rows of top stitching to secure the handle to the back of the bag.
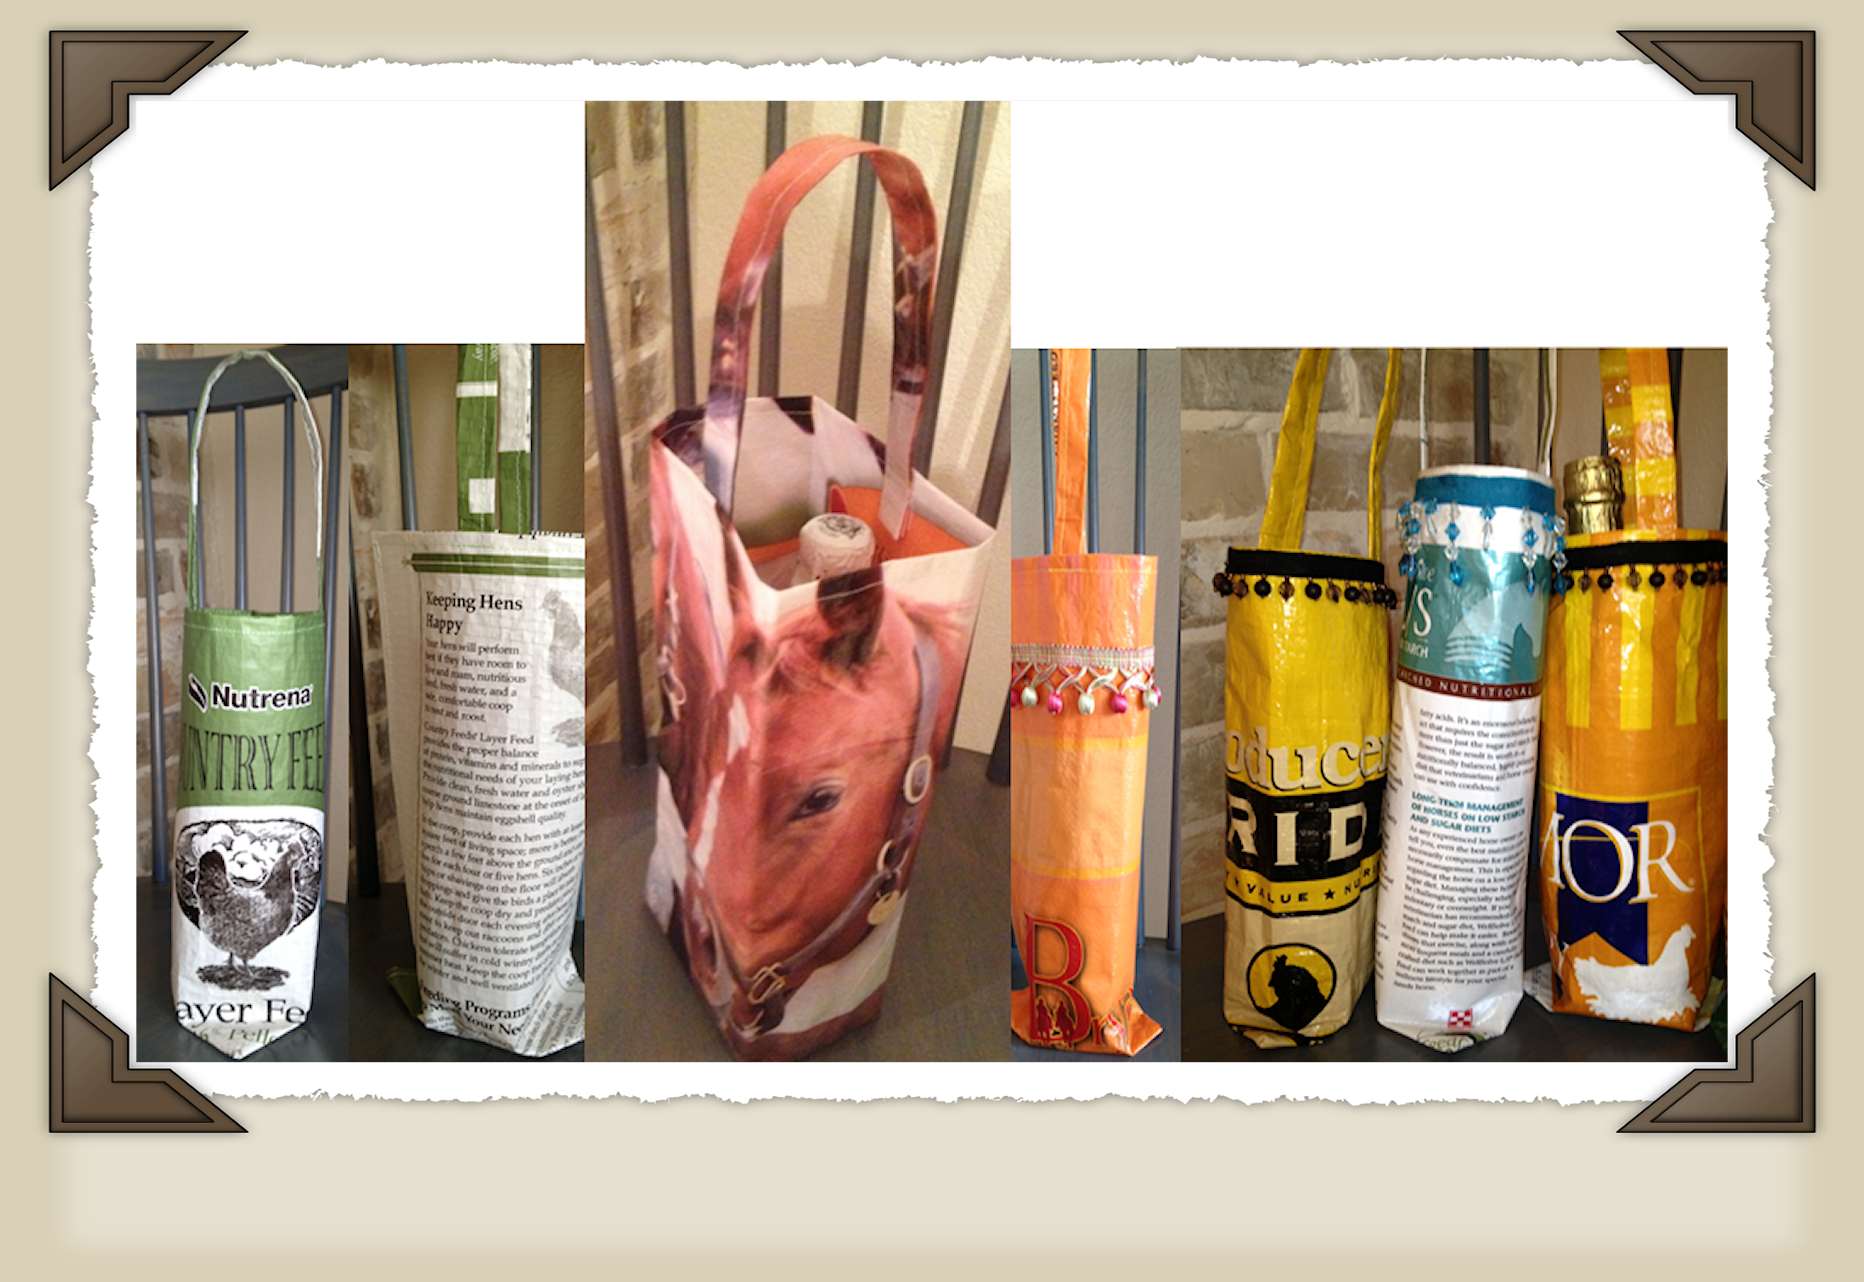
Here are some examples of finished feed sack wine tote bags.

Check out more examples of our up-cycled feed sack products at: